|
Version 3 (July 11, 2001)
Author: Stephen S. Lee (ssjlee@shell.rawbw.com)
Continued from the Wizardry IV Guide.
Turn off the Status and the Command list by pressing (O) to begin with. This will let you see items on the ground and ceiling more easily.
Go north to Pentagram 1. Summon a group of Creeping Coins, a group of Zombies, and a group of Level 1 Priests. There should be 9 Coins, and at least 4 each of the other two; if there aren't, move off and on the pentagram and try again. (You can always go with fewer monsters, but combat is difficult enough that you probably don't want to press your luck.)
The Creeping Coins always number nine, and they can call for help and breathe for 1 damage to each enemy. The Zombies can paralyze enemies. They're vulnerable to dispel attacks, but are powerful enough to be worth the risk. The Level 1 Priests cast the Milwa spell, and can also heal you. (If you read the starting hint enclosed with the game, you know this. If you had a hard time figuring this out, it only gets harder.) They even have good fighting capability.
Go one west and go north and south and north and south, etc., until you get a battle. Fight it out, and hope that a Level 1 Priest casts a Milwa. If a Milwa isn't cast, keep wandering until someone casts it. (You can't cast it yourself, yet.) Take Dios Potions and Halito, Badios, or Katino scrolls. They're not only useful, but provide excellent bait for Thieves. (Always leave two spaces open in your inventory.)
When it is cast, a secret door will be revealed on the north side of the room. Exit via this door, and go 1N. Go 1W, 5S, and 1E, battling your Guardians as they come along. (If, at any time until you defeat the Outer Guardian, you run out of spells or a kind of monster, reverse these instructions to charge up at the Pentagram)
Go 2S, ignoring the message. This Inner Guardian should be relatively easy. Then go 4W, and 4N. Your MILWA may run out, so you may need to wait for an encounter and have it cast to see the door here.
Go west through the door, ignoring the message, and one more west and fight the Middle Guardian. He isn't hard, either. Then go 6N, 13E, 6S to (16E, 9N). Make sure you're at full power, then save the game facing the door, which you need a Milwa spell to discover.
Go 2E, reading the message, and try to defeat the Outer Guardian. He can cast the Mahalito spell, so he might hurt quite a bit.
Now go 7S, 16W, and 4N to the pentagram at (2E, 6N). Summon the same allies again, then go 12N 8E to south of a door (10E, 18N). Save the game. Go 1N and read the message, then go 1E and battle the last guardian of this level. Use Halito repeatedly. Once you win, take the Charred Tallow (Black Candle) and the Amulet (Jeweled Amulet). The Amulet can cast Dumapic, and the Black Candle can cast Lomilwa. Equip the Candle, but don't use it, as it may disappear. Leave two spaces open in your inventory.
Don't save the game yet! Head east, passing the stairs going up, and head down this very very long corridor until you reach the end of it. You'll find the Bloodstone. Take it, and invoke its power via the (E)quip command. You can't equip it, though, and if a Thief steals it, or any other stone, restart from the last saved game. (That's why it's a good idea to hold "bait" for the Thieves.) Return to the stairs and go up.
(If you do not want to deal as much with having essential items stolen by thieves, you can come back and get the stone later only when you need it. In principle, you do not actually need any stones until you escape from the dungeon.)
Go 6N and 2W to (0E, 6N) and summon Level 3 Priests, Mummies, and a No-See-Um swarm. (The Priests cast healing and light, the Mummies drain levels from your foes, and the No-See-Ums can breathe for 1 to 4 damage to each foe.) You should have at least 4 Lvl 3 Priests and at least 4 Mummies. Go 1E, and save the game.
Start poking your head into all the doors in this corridor. You'll get plenty of encounters. (Don't go beyond the bend at the end of the hall yet.) Defeating Talon's Tigers is relatively easy, and you'll get the Cone of Silence, which casts Montino (useful if you're having trouble with do-gooders casting mass damage spells) and is invokable. But if you find Greyhawk's Ghostbusters, run away; they are much more powerful than you at this stage in the game. You can fight Brightblade the Samurai as well and get his Beanie (Novice's Cap) which casts a Katino and can be invoked.
Go north to the end of the hall to (2E, 17N). Go 2W, 1N. Defeat the Privates (not too hard). Go north and fight the Corporals (not too hard, either). Then go 1N and destroy the Captain and his gang (this one might kill you, but you should be able to win.) Take the Cloak (Twilight Cloak); you might want to invoke its power.
Go 1S, 1W, 1S, and 2E, returning to (2E, 17N). Go 15E to the end of the hall, and turn and go 15S to the end of THIS hall (17E, 2N). Go 2E and 1S. Defeat the Privates. Go 1 south and defeat the Corporals. Go 1W and obtain the Lander's Turquoise it. Invoke it and hang onto it. (Optionally, you can get this later in the game only just before you're about to use it.)
Go 1E, 2N, 2W, 15N, and 4W to (13E, 17N). If you don't have a Milwa spell on, find a battle so a Priest can cast it. Go 3S (through a secret door) and read the message. Go 1E, 9S, and 5W to the stairs up.
(If you recharge at the Pentagram on this level, reverse the directions EXACTLY; otherwise you may get killed walking over the land mines that litter the level. The land mines get more powerful the farther south you go. Also, remember to restore from a saved game if one of your Stones is stolen.)
Go 1W and read the message. Go east until the wall, to (19E, 19N). Go 4S and 1W, to the pentagram at (18E, 15N). Summon some Level 5 Priests, some Spirits (they can cast Mahalito) and some Shades (which drain levels). You should have a least 3 Shades, 4 Priests, and 5 Spirits. Go 1W and save the game.
Head 4W to (13E, 15N). Go 3S. You'll probably find the two large bands of adventurers guarding this level somewhere along the line here; they're not too hard to take out with all your mass damage spells.
Don't save the game! Go to the pentagram and recharge, and follow these directions PRECISELY: 5W, 3S, 3E, 3S, 1E, 2S, 4W, 2N, 3W, 2N, 1W, 3N, 4W, 3S, 1W, 1S, 1W, 2S, 5E, 1S, 1E, 2S, 2E, 1S, 5E, 2S, 3E, 2S, 5W. You should now be at (14E, 0N).
Go 1N. Enter the pool (you will take some damage from acid) and retrieve the Witching Rod. It casts a Kandi (it'll tell you where Trebor's Ghost is at the moment), but don't use it; it might disappear. (You do not actually need the Rod until later in the game, so you might want to come back later, after escaping the dngeon.) Go 1S, 3W, 2N, 4W, 2N, 2W, 1S, 1W, 3S, 3W to (1E, 0N).
Make sure you're at full strength, and go 1N. Defeat Glum, the Assassin. Take the Weighty Cube, which is the Black Box, and equip it. If you use it (it won't disappear), you can stuff any unequipped object you like into it -- up to 19 new objects; the extra inventory space is essential. (But don't try to put the Black Box into the Black Box itself! Unless you've saved the game and want to see a funny message, that is.) You should have the two stones and the Witching Rod in it, and maybe assorted amulets, potions, and scrolls. Go 1W, and head up.
You won't need "thief-bait" anymore now that you have the Black Box.
If you don't mind delaying getting the best weapon in the game, you can also skip this section and skip restoring the Temple of the Dreampainter, which is up shortly, until later. Doing so, while it will make life easier now, will make life tougher later as you will be without a weapon that enhances your powers. Your call. I would get the stones now, personally. If you wait for a longer time, you can fly over the pits with the Winged Boots, so you don't have to collect lots of healing potions to survive.
If you want to easily view all three Evil endings (which are all quite different), you should delay getting the sword for as long as possible. You do not need it until you after have escaped from the dungeon.
Don't let the Darkness scare you. There are only 3 squares of it (all that you see). Go 2N and read; then move 1S, 1E, and 3N to (1E, 4N) and read. Go 2S, 1E, 2S, 2E, and 1E to the pentagram. (Gather Dios potions, as many as you can get, and stuff them in the Black Box.)
Single encounters on this level aren't hard, and you'll find no thieves also. Killer the Ninja has a Cloak which you might want. The groups you find are fiendishly difficult for a newcomer to the level.
Charge up at the Pentagram. Summon Spirits from the previous Pentagram, Priestesses, and Goblin Shamans (who are a tad more powerful than Spirits). Priestesses are what Level 7 Priests would be like, and the Shamans cast 3rd level Mage spells and 2nd level Priest spells. I did not find any of the other Level 4 monsters to be as effective as Spirits. Have at least 4 of each. Go 1S and 4W. Go back down, to Level 8. Save the game. Go east and kill Glum again. (You could go south and face the Golem instead if you want a little variety.) Save the game. Wander about on the path shown above until you get plenty of Dios potions. Follow the path to (3E, 9N). (Don't return to the Pentagram on Level 7; recharge at the Pentagram on this level.) From Glum, it is: 1S, 3E, 3N, 1E, 1N, 2E, 2S, 4E, 2S, 8E, 2N, 3W, 2N, 5W, 1N, 2W, 2N, 1W, 1N, 5W, and 1N. Face west. Save. Reload and turn Status On.
Go 2W. (You'll take 10 damage for each step because of the Land Mines.) If you don't have an encounter, you may want to restore, as your Priests can heal you wounds in battle. Go 1W. Take the Golden Pyrite, invoke it, and stuff it in the Box. Go 4S. If your Hit Points become a single digit, camp and use your Dios Potions. Take the Amber Dragon Stone, invoke it, and place it in the Box. Go 1W and 3S to (19E, 2N), healing along the way. You can throw awy any remaining potions. Go 2S, 8W, 2N, 4W, 2N, 2W, 1S, 1W, 3S, 3W, 1N, 1W, then go up. Save and go 4E. Save again if you make it.
Now at (4E, 0N), camp and use the Black Candle. If it disappears, restore and try again. Put it back in the Box and equip the Box again; equipping the Candle de-equips the Box. (Gather Jeweled Amulets while on this level.)
Go 1N and summon the same friends. Go 1S and 10E. Along the way, you'll probably be assailed by the two large groups of guards. Don't take the "Use Me Cape"; it's *very* badly cursed, and you have no way of removing a cursed item at this stage of the game. (You can try it and use it just to see the messages you get, but save the game first.) Thorin (of Thorin's Tramplers) is tough but has the MordorCharge Card; put it in the Box if you wish, though it's not necessary to solving the game. If you encounter mages named Tele-Vipers or Voltar, kill them quickly as they can cast the Makanito spell, which at your low level will automatically instantly kill you.
Your priestly allies should at some point cast the Maporfic spell, which lowers your AC by 2. It's good to have, and it lasts for the rest of the game (thankfully, as you are a mage, there are no anti-magic zones in this game).
Once you reach (14E, 0N), take the western door on the north side of the room, and do the same for the next 6 rooms (the last being a secret door north of 9 east, 13 north). Go 3N, 1E, 1N, and read. Go 1E and read, then go 1E and read. Camp. Take out the Bloodstone, the Lander's Turquoise, and the Amber Dragon. Invoke all three of these now, and go 2W, 1N. Place the stones in reverse order on the altar. You will be offered a Sword. The Amber Sword (Dragon's Claw) gives you once swing for up to 24 damage, and will regenerate 4 hit points each round, or periodically outside of combat. The other two, the West Wind Sword and the East Wind Sword, cannot regenerate but are both superb fighting weapons; they also boost your chance to hit. Take the sword of your choice; experiment a little and settle for your favorite. (Notice that the sword you select has a bearing on three of the five game conclusions, so you might want to retrieve the sword later -- although in the meantime the fighting will be considerably harder.) Go 1E. Go up. Save the game.
This level is constructed of 16 4x4 clusters all set out in a neat, orderly manner, with a spinner at the intersection of the junction of the passages between the clusters. Each horizontal row of clusters always has the same formation, but vertically it's always different. (There are 3 pentagrams on this level.) On each side of each cluster there is a door, but only the door on the west side of each cluster is usable. This is useful knowledge. When you get spun around, go forward and check both doors between the intersection you left and the intersection ahead. If the first one is real, the Spinner took you north; if the second is real, the Spinner sent you south. If neither is real, you can't tell, and must cast a Dumapic, preferably with a Jeweled Amulet (you will quite possibly need to cast more than the maximum 9 Dumapic spells you can cast yourself). Use this to guide your way through the level.
You'll start at (6D, 7E, 6N). Go 1W, 1N, 1E, 1N, 2W, 3S, 1W, 1S to the Spinner at (4E, 4N). Head west to the Spinner at (19E, 4N). Head north and enter the door on your right. Go 3N, 2E, 1S, 1W to a Pentagram. Summon Goblin Shamans from the previous pentagram, Bishops (who can cast some fairly high-level spells, unlike a regular PC bishop in a regular Wizardry games), and Wights (these are very powerful; they cast Dalto and Lahalito, they can paralyze, and they drain 2 levels when they land a melee blow). Be sure that you have 3 Wights, preferably 4, and at least 4 of the other two. Go 1E. Save. (If, at any time, you find a Sentinel, defeating it will return you to the cluster holding this pentagram.) Combat is very easy on this and the next level with the Makanito spell (you need to do the right things for this to be effective, however, and I am not certain just what they are).
The leader of one of the two teams on this level holds a Holy Reliquary (Saint Rimbo Digit) which will cast the powerful Tiltowait spell. Use it sparingly; if it disappears, you'll have to return to this level to get another one. Also, beware the bishop named Tiltowait (who can cast the same spell as his name).
Exit the cluster and return to (19E, 4N). Go north to the spinner at (19E, 9N). Go west to the spinner at (14E, 9N). Go west to the spinner at (9E, 9N). Go north and enter the door on the right. Go 3E, 1N, 2W, 2N, 1E, 1S, 1E, and 1N. You'll be asked an easy riddle (the answer, of course, is AMULET). Take the Good Hope Cape he gives you and equip it. The Cape will give you one extra attack, boost the damage you can cause with your weapon, increase your to-hit statistic, and will also augment your spellcasting capabilities. (Boz the Thief has another magic cloak you might want to check out, though you are almost certainly better off with the Good Hope Cape.)
Exit the cluster and return to (9E, 9N). Go north to the spinner at (9E, 14N). Go north to the spinner at (9E, 19N). Go north, enter the door, then go 3N, 1E, 2S, 2E, and save the game. Go north and fight Jesse The Smith (make sure you have room for two objects beforehand). He has 89 HP and can cast Lakanito; try not to use the Digit. When he is defeated take his Turban and his Tale of Madness (Arabic Diary). You'll be ported to the stairs up at (17E, 9N); take them and encamp. Invoke the Turban and box it. It can only cast Halito, but you should hang onto it. (Actually, I'm not certain what for now, but not only did I originally write this, but the Quest for Clues II walkthrough says it is essential as well. Huh. Anyone know for sure?) Pack away the Arabic Diary.
This level is a confusing matrix of light squares and dark squares, arranged like a chessboard; but there are walls, and near the walls, you'll discover that all is dark. There are also Butterflies hanging around by the dozen around here; there are 10 kinds (5 of each alignment).
Go 1 east. Read. Go 4 east. Go north to the pentagram at 5 east 5 north. As on the previous level, combat is easy, except this time you can use the Lakanito spell. But run away from or quickly defeat Mage Marian if you can, as she can cast the Tiltowait spell. You'll also find a few special objects: a Furred Cone (a Magician's Hat), and the Cape of Hide. Place both in the Box (they are obtainable from some of the combats on the levels). The Cape of Hide, when used, will first cast a Malor spell, and subsequently a Dios spell; it will never, ever, run out of charges. It's a nice source of healing to have, as soon you will no longer be able to summon new powerful priestly allies from pentagrams. (Allies that can cast sixth- and seventh-level priest spells never become available. Pity, as Mabadi would have been really nice in some major battles.)
Summon some Wights (again), and also some Gas Dragons (real nice, but a Lakanito will kill most or all of them) and some Priests of Fung. Have 4 Wights, at least 5 Priests of Fung, and at least 3 Gas Dragons. Wights (being undead) are very vulnerable to Horin's Holy Rollers on this level, but they're still too powerful not to have around, if you ask me.
Save at Pentagram 6. Don't stray off this trail, and use Lakanito on any Mages or any encounter containing more than one foe: 2 south. 3 west. Defeat the D-3 Evil Priest Gaudy Sphinx. 2 north. 2 west. Defeat the L-1 Good Fighter Meleager Blue. 1 north. 3 east. Defeat the L-3 Good Priest Purple Emperor. 4 east. Defeat the D-4 Evil Thief Emperor Tau. 1 north. 1 west. Defeat the L-4 Good Bishop Golden Danaid. 1 north. 4 east. Defeat the D-1 Evil Fighter Io. 2 west. 2 south. (Make sure you have enough strength to go on.) 4 east. Defeat the Pair of L-5 Fighters, Mistress Flavia and John Ap Griffin. Take the "unusual object" appearing there. Don't invoke it yet; every time you use it, there is a chance it will disappear, and always if it is not equipped. Put it in the Black Box.
Don't save the game at any point -- it will mean that you will have to defeat many strong enemies over again! 1 east, 2 north. This square at 13 east 8 north teleports you to 16 east 0 north. 1 north. 3 east. 12 north. 1 west. 2 north. 1 east. 4 north. (19 east 19 north. If you need to go restore strength, there is a teleporter at 18 east 3 north that will port you to 11 east 2 north. Make sure that you are in the fourth rank.) 7 west. Kill the D-5 Evil Ninja Death's Head. (You only have to defeat an L-2 and a D-2 now.) 3 west. 1 south. You'll find a dead body here, with an Oxygen Mask (supposedly, a euphemism for "demonic ritual mask", or whatever it was). Take it, equip it, and invoke it. The Mask will give you 100% protection against any Makanito and Lakanito spells, but, of course, it does not extend to your allies. It will only have effect you if you invoke it. Its effect wears off if you move to a different level; you must invoke it again (although there is a chance it will break) to retain the protection. If you use it twice on a level, without moving to any other level, the item will explode. Also, it will explode if you do not have it equipped. (If you need to get it again, it's at 5 down 9 east 18 north.)
Go: 1 north. 10 east. 4 south. 1 west. 4 south. Defeat the L-2 Good Mage Silverstripe (the Mask will protect you here). 3 south. 1 west. Pick off the D-2 Evil Mage Lappet. Recharge at Pentagram if necessary. 2 east. 5 north. 1 west. 2 north. 1 east. 4 north. 12 west. 2 south. 2 west to the Stairs Up at 5 east 17 north. Save the game before taking, and don't save until you reach the pentagram.
This level is probably one of the most fiendish to map in computer gaming history. The place is jam-packed with one-way passages, cages, and rotating rooms. One-way passages ought to be self-explanatory. Cages are 1X1 rooms constructed so that a one-way passage enters or that a rotating room (see below) drains into the room. Then it closes on you and you're trapped. You can only escape by casting a Malor (by a spell, a Diadem, or the Cape of Hide) way back to the Catacombs (teleporting higher at this point results in deflection); or you can use the GetOutOfJailFree card (unidentified, 'A Yellow Card') held by a guardian on this level. (Using the card gets you out in a random direction.) Rotating rooms have walls, or one-way passages, on two or three sides. If you enter them, or if you camp in one, the room will rotate in a preset direction (for a particular room the direction is constant, but two different rooms may go different ways). Saving and reloading rotates all rooms like this. (Note that this construct allows two adjacent rotating rooms to have a shared wall; the wall in common may "move around" in both rooms.)
Go 1E, and 1E through a one-way passage. Go 2N into a rotator. Go east through the provided exit into another rotator. Go 2N and hit yet another rotator. Exit and reenter until the rotator faces north, then go 1N and 2W to Pentagram 7. (South of this pentagram there are one-way passages that can trap you in such a way that the only escape is by Malor, and also makes the game impossible to solve though it's not immediately obvious; be careful not to enter that area.)
Summon some monsters (suggested: Wights, Priests of Fung, and Evil Eyes; the Pentagram 7 monsters are relatively weak, so you may want to experiment a little). This pentagram is at (1E, 7N); others may be found at (12E, 0N) and (16E, 16N). As for encounters, they are quite a bit rarer on this level. Dorion's Grays is hard; Dorion has enough hit points to survive a Tiltowait and casts a Tiltowait himself. Khan's Kosmic Killers has no fighter-types (Fighter, Samurai, Lord, Ninja) at all, and its 2 thieves and 4 spell-casters shouldn't hurt badly if you use your Oxygen Mask. Many members of both of these teams can be killed by a Lakanito; those who aren't killed should be finished with a Tiltowait.
2E, 1S back into the rotator. Exit and re-enter until it faces south. Head straight south into a rotator. Exit east. Nearby, at (6E, 6N), there is a rotator. Look around to find the entrance. (If there isn't, save and reload, and one should appear.) Enter and exit south. You should find the Ron Wartow Memorial Pool. (This is not necessary if you are seeking one of three Evil alignment endings.) Take a dip. Your alignment will change to Neutral. Exit south through a one-way passage. DON'T STRAY from here on; there are many one way passages here that will force you to backtrack. 1E, 1N, 3E, 3N, then 5W through a one-way passage at the end. 1N through a one-way passage. 2N through a one-way passage. 3N. Visit the Witch. You already have the Tannic Acid (the Witching Rod; remember, it came from the wood of the trees, and the trees leaked the pool of acid whence the rod came), the Fe-S-Sub-2 (that is, the Golden Pyrite; a molecule of pyrite is composed of one iron and two sulfur atoms -- Starcross and Stationfall aren't the only games where a little outside chemistry knowledge comes in handy), and the Furred Cone (Magician's Hat). The Blender is a Blade Cusinart' (check out its picture on the copy protection booklet), the Spanish Unguent is the Cleansing Oil (Oil of Ole! get it?), and the Camphor is the Aromatic Ball (all found later). 2S, 1W, 3N, 13E. (There is a pentagram near here if you need it.) 1N, 2E, then 3N to the upper-right hand corner. 6N, 2W, 1N, 2W, 1N, 1W, 2N. Take a Marble (the Aromatic Ball), invoke it once, and keep it safe in the Box. Camp and teleport to (10D, 11E, 19N) if you lost the Black Candle. Then teleport to (9D, 9E, 5N). (Until later in the game you cannot cast Malor to anywhere other than 10 Down and 9 Down.)
(Since you can't teleport directly to the Dreampainter at this stage in the game, follow these instructions, which are the same as before:)
Go up, then 10E, 3S, 2W, 1S. (Ignore the pentagram because the monsters are weak to you now. You may use the Winged Boots to fly over land mines; be sure to restore if they explode.) 4W, 3S, 3E, 3S, 1E, 2S, 4W, 2N, 3W, 2N, 1W, 3N, 4W, 3S, 1W, 1S, 1W, 2S, 5E, 1S, 1E, 2S, 2E, 1S, 5E, 2S, 3E, 2S, 8W, 2N, 4W, 2N, 2W, 1S, 1W, 3S, 4W. Bash Golem. 1N, then go up. 19E, 2N. Camp and invoke the Winged Boots. Now you can safely move about the ziggurat. 12N, 2W. Look at the Advertising Blimp (which turns out to be a false lead). 4N, then 6W to (11E, 18N). 3W, reading messages as you go. 2W. Take the Orange Rod (Hopalong Carrot). 5W, 18S, 4E, 8N to (7D, 5E, 8N).
Unequip the Winged Boots. Face north and save the game. Equip the Hopalong Carrot and invoke its power. You'll jump over the wall, to (7D, 6E, 8N). Re-equip your main weapon and pack away Carrot. 1E. Kill the Dreampainter and take the Feather, his Ka (soul). Hold it. Re-equip the Winged Boots. Teleport to (9D, 11E, 6N).
Read; 1W and read again. 1N, read, 1W, 1N. Defeat the Hellhound and take the Bones (Demonic Chimes). 1N, read, 1N to (9D, 9E, 10N), the Gates of Hell (no relation to Microsoft's founding father). Equip the Boots, and Arabic Diary, Black Candle, and Demonic Chimes outside the box. Save the game.
Use the Demonic Chimes (bell), the Arabic Diary (book), and the Black Candle. No other order will work (incidentally, this is the same order used in Ultima IV, and different from Zork I and Nethack). This will melt the gates. Enter and retrieve the Holy Hand Grenade of Aunty Ock, abbreviated as HHGofAunty Ock\\. (Try entering without the Ka or the Boots, and without both, just for fun.)
Place the Holy Hand Grenade of Aunty Ock in the Box and re-equip your normal equipment. Cast Malor to teleport 5S. Follow the instructions given for the "hideout of the Dreampainter" until you arrive in the Temple. Go 16E and Save. Use Candle (if it disappears, reload and try again). Take left door on northern side and keep taking left doors until there is only a right door. Take it. 1E, 3N reading messages. 1E. Up. A good place to save the game.
Leave this cluster and go 1S to a spinner. Go 1 spinner south, then two spinners east. 1 north to (9E, 0N). 1E, 3N, 1E, 2S, 2E, 1N. Kill Jesse the Smith. Go up. 5E, 5N (recharge here), 1E, 2S, 2E, 3N, 3E, 2N, 2E to port to (5D, 16E, 0N). 1N, 3E, 12N, 1W, 2N, 1E, 4N, 7W and kill D-5 Creature. 1W, 2S, 7W and go up. Follow Maze of Wandering directions until you reach the location of the Marbles. 2E, 2N, 1E, 3N, 1E, 1N (ignore), 1E and go up.
Once you go up, you are committed to the Cosmic Cube, and may not leave until you have gotten all the way through. If you don't have the sword from the Temple of the Dreampainter yet, it's helpful to have (unless you want to see all three Evil endings easily), but you absolutely need the Holy Hand Grenade at its end. (If you don't, you'll have to replay a good part of the game.)
The Cosmic Cube comprises Levels 3, 2, and 1. Each floor is divided into segments. Each cluster, as I'll call them, has one or more chutes, stairs up, stairs down, or teleporters to other clusters in the cube. (Note: "stairs up" don't always go "up", and "stairs down" don't always go "down".) In the following directions, you'll see the cluster number, then the location of the entrance to the cluster, in terms of down, east, and north, in that order.)
Whenever you enter a chute or teleporter, or climb stairs, you will restore defeated guardians to life.
The Company (3 down) has a Diadem of Malor, and a 3-Sided Cloth (Wizard's Skullcap), the latter of which is a nice piece of equipment. Joachim's Jihad (2 down) is tough to defeat; they carry a Silk Cloth (Pennonceaux) which is required to win the game. Loktar's Lucky Laddies (1 down) are not difficult to defeat, and carry the Holy Limp Wrist, which is needed to reach four of the five possible solutions of the game. Applet's Angels (1 down) is by far the toughest random guardian group in the dungeon; they're carrying the Adept Baldness (which however isn't all that useful compared to the Wizard's Skullcap).
When you summon from Pentagram 8, get at least 5 Champ Samurai, 3 Brass Dragons, and 4 Fiends. (Champ Samurai are pretty pathetic spellcasters in the first two Wizardry games, but they're potent here.) When summoning from Pentagram 9, get at least 5 Champ Samurai, 5 Fiends, and 3 Dragon Zombies. (I didn't find most Pentagram 9 monsters to be all that useful, though you may find Succubi to be a decent replacement for Dragon Zombies.) When summoning from Pentagram 10, get a Demon Lord and at least 4 Greater Demons. These are definitely the strongest; there are many powerful Pentagram 10 monsters for the third group, so feel free to experiment a little. If summoning Maelifics (my vote for the best; they do have the drawback of being vulnerable to dispel effects, though they're otherwise very powerful), Vampire Lords, Lycurgi, Fleck, or A Dink (more on this last one later), you can only get one. If you get Poison Giants, Iron Golems, Gold Dragons, or Black Dragons, get four.
Instructions:
You must retrieve the Holy Limp Wrist and the Pennonceaux, both mentioned above. You must also get a Blade Cusinart' (unidentified: Sword, so it can be a pain to pick it out of the pile of looted equipment) which is held by many stronger Samurai, and there's also one held by a member of Joachim's Jihad. If pressed, there is a guaranteed easy-to-identify Blade Cusinart' later on, but life is much easier if you get it earlier. You may also want a Dagger of Speed (held by some Mages), and a Diadem of Malor.
(Note: the cluster numbering is arbitrary, and refers to the maps I made originally.)
Be sure to save often, as death can be a common and frustrating experience. The best time to save is right after climbing stairs or falling through a chute.
CLUSTER 0 (1-15,11):
Go north and read. (If you do this puzzle
wrong the exit to the Cube will disappear!) It's not hard to solve, if not by a
little logic (process of elimination will work here), by sheer trial an error
-- you'll know when you've used the right door. Go through the middle door
(this does not change from game to game, unlike in, say, Zork Zero) and read.
North to a teleporter. A good place to save.
CLUSTER 3 (3-19,15):
West one. (The instructions here will
ignore these sometimes misleading signs such as the one that appear here.) 2N,
then take stairs.
CLUSTER 1 (1-19,19):
4W, 2S into a chute. (The stairs you see
here are the real exit from the Cube, but they are inaccessible for now.)
CLUSTER 4 (2-12,19):
5S, 2W, 4N, 3W, 1N, 4E, 4S, to ...
CLUSTER 5 (1-2,17):
2S, 2W, 1S, 1E. (This pentagram will only
let you summon extremely weak allies, but it gives you 100 hit points max. Take
A Dink, Fuzzballs, and Creeping Coins. The Dink and the Fuzzballs are not
affected by magic, which enhances your chance of holding up until you can get
some real help.) 1W, 1N, 2E, 2S, 1E, and 1S into a chute.
CLUSTER 6 (3-14,8):
3N, 2E, 2N to Pentagram 8, then 2W into a chute.
CLUSTER 9 (2-0,9):
10N, 4E, 1S, 3W to teleport to (2D, 3E, 2N),
still in Cluster 9. 2N, 1E (teleporters line the eastern wall, beware), 1N, 1E,
1N, 2E, 2N, 1E, 1N to Pentagram 9. Go 2E, then take the stairs up.
CLUSTER 10 (2-5,19):
1E, 3S into a chute.
CLUSTER 11 (1-9,19):
1E, 1S, 1E, 1N, 1E, 1S, 1E, 1N, 1E, 2S,
1W, 1S, 1E, 1S, 1W, 1S, 1W, 1S, 1W, 1N, 1W, 1S, 1W, 2N, 1E, 2N, 1E, 1S, 1E, 1S,
1W into a chute.
CLUSTER 12 (3-13,11):
Go 1W into a chute.
CLUSTER 13 (2-14,9):
1S into the chute.
CLUSTER 14 (1-13,9):
This 2X3 room has spinners, but aim: 2S,
1W, then take the stairs.
CLUSTER 15 (1-16,10):
1E, 1S, 1W, 1S, 1E, 1S to a sign. 1W,
2S, 1W, 2S, 2E, 2S, 1W into a chute.
CLUSTER 17 (2-3,7):
2E into a chute.
CLUSTER 18 (2-3,11):
This large room has pits that will strike
for minimal damage. You can use the Winged Boots to fly over them; be sure to
restore your saved game if they explode. 3N. Buy the Cleansing Oil (need 50,000
GP, which shouldn't be a problem) 3E, 1S. Recharge at this pentagram. 5E, 5S,
1W and take the stairs.
CLUSTER 20 (3-10,9):
5N, 3W. Save the game. 1W; if a group
appears, kill it. 1W. Recharge, then go 1N, 3W, 2S, 1E (if a group appears,
kill it), 1W, 2N, 3E, 1S. Recharge if necessary. 1N, 1W, 2N, then 3E through an
invisible door. 1E to port to (2E, 17N). 1W, then 1S to port to (8E, 11N). 1N,
then 1 east to port to (12E, 16N). 1E, 1N, 1W, 1N, 2E, 1N and leave the stairs
alone. 1E, 1S, 1E, 1N, 1E. Summon A Dink, Fuzzballs, and Creeping Coins. 1S,
1E, 1N, 1E (ignore), 1S (ignore), 1S again then take the stairs.
CLUSTER 21 (1-16,3):
Here's Pentagram 10. After summoning head
1S into the darkness, then go 3W. Buy the 'you know what.' It's the St. Trebor
Rump. Invoke it (this will remove the threat of Trebor's apparition). Save it
in the Box. 1S, 4W, 1S, 2W, 2N, then 1E into a chute.
CLUSTER 22 (2-16,19):
Invoke the Black Candle. If it
disappears, reload and try again. 1E, 16S, 1E, 1S, then take the stairs.
CLUSTER 19 (1-0,7):
By now your Greater Demons should have
'reproduced' into a group of nine (very useful). Save the game. 1N, 1E, 1N, 1E,
1N, 1E, 1N to a sign. 1E, 1S, 3E to another sign. Ignore the pentagram at (5E,
11N, 1D). 1N, 1E, 1S, 1E, 1S, and take the stairs. (There is a useful pentagram
to the west of the stairs if you need it.)
CLUSTER 24 (3-11,5):
Save the game. 1W, 3N, 6W, 8S to a sign.
9E, 3N, 1W, 1N, 3W, 3N, 4W, 6S, 7E, 1N, 1W, 1N, 3W, 3N, 2W, 4S, 4E into a teleporter.
CLUSTER 25 (1-3,0):
Save the game. 1E, 1N, 1E, 1N, 1E, 1N, 1E,
1N, 1E, 1N. Take the stairs.
CLUSTER 26 (3-3,8):
1W. Save the game. If you are really
desperate, there is an Eighth Pentagram at (2E, 7N, 3D), but you shouldn't use
it if you still have 3 groups and a decent number of spell points. 2W, 1S, 1E,
1S, 1E, 1S, 1E, 1S, 1W, 1S, 1W, 1N, 1W, 4S, 1E, 2N into a teleporter.
CLUSTER 27 (2-12,7):
Save the game. Nothing here but thousands
of spinners. You start in a little cove dug towards the east. Use the walls,
not the Dumapic spell, to guide you. 3W, 5S, 1W into a teleporter. Dumapic and
check to make sure you're at...
CLUSTER 28 (1-18,14):
(If you aren't here, you've entered
another portal adjacent to the proper one. Try again.) 1N to a sign. (If you
take the stairs to the right you'll be whisked back to the entrance to the
Cosmic Cube!) 2W, 1S and reload on a Demon Lord, Greater Demons, and your
favorite third group (above). 1N. Save the game! (Be sure you have 6 Greater
Demons.) 1W to the sign announcing the exit. Camp. Remove the Holy Hand Grenade
of Aunty Ock and the Cleansing Oil from the Black Box. Equip both these
objects. (The HHG will temporarily replace your Sword.) Don't invoke either
yet. Dumapic to make sure you're at (15E, 15N, 1D). Invoke the Holy Hand
Grenade, but not the Cleansing Oil in the same equipping process. Now invoke
the Cleansing Oil. (It will also remove other cursed items for you.) Return to
your previous equipment set. (your Sword, Good Hope Cape, Saint Rimbo Digit,
Wizard's Skullcap, Oxygen Mask, Black Box.) Box the Oil. Drop the Holy Hand
Grenade. Quickly (and I mean quickly) leave camp and go 3E, 1S. You don't need
to do this so fast in the Archives version, but in the original, this part is
done in real time. You should still get away from the explosion regardless.
(There is no danger involved in counting to a wrong number, incidentally.)
After the bang, go 1N, 3W, 1N through the hole in the wall. Take the stairs and
leave the prison.
(If you only want to do the Evil endings, you can skip all the quests where you gather objects for Trebor's orders, like this one. You will have to fight some extra combats, however.)
Now you can teleport to anywhere in the prison, and also to 0 east 0 north 0 down (where you are right now). Read your Victory Message. (The stairs to the east will return you to the stairs that took you out of the dungeon.) Malor to 5E, 14N, 4D. (Need: Cleansing Oil, Aromatic Ball, Blade Cusinart, Magician's Hat, Golden Pyrite, Witching Rod.) You don't need to take them out of the Box. Say 'yes' and retrieve the Dab of Puce (a renowned pigment famed with good painters). Place it in...well, you know where. Now, if you haven't retrieved the Holy Limp Wrist and the Pennonceaux, do so now. Return to 0 east 0 north 0 down and save beforhand if you do so.
If, ever, your party becomes exhausted, you can teleport to a Tenth Pentagram at 16 east 14 north 1 down, but you probably won't be able to port back inside the Castle, so be careful.
Starting at 0 east, 0 north, 0 down, go 9 east (passing the stairs) and 1 north. The password is 'TREBOR SUX'. (There is a clue to this in the Oracle's pronouncements, but even with that you need to be intimately familiar with the original Wizardry to get this one on your own.) 1 north. 5 west. Save the game.
[For fun, from this spot: 1 north, 2 east, 4 north, 2 east, 4 south, 2 east and kill, 2 north and kill, 2 north and kill. These are all easy, and are excellent places to generate extra Greater Demons. 2 east, 4 south, 1 east and read, 1 north. You can try, but you won't be able to get it!]
Go 6 north, 2 west, 7 north, and take the stairs up.
[This begins at 3 east 15 north -1 down.]
1 north. Go up. 1 north. Destroy! 1 south. Go back down. 1 north and annihilate. 7 east (don't stray off this path or you will have to start over). Bash in the Herald, and then pick off his friends. 6 east and relieve this Sentry of his life. 2 south. Go up. 1 north. Kill the Innkeyper and take the Key, and Box it. 1 south. 1 down. (Make sure you have at least about 50 hit points.) 1 west and fall to 15 east 16 north 0 down.
Head 1 south, 2 east, 5 south. Go west, unlocking the door with your Inn Key. 1 north and look and read. 1 north and defeat the Walking Wounded. 1 north into the rooms. 2 west. 1 south. Go up.
Go 1 north and get the Orb of Dreams from Tygger's Cubs (you must have the Pennonceaux). Go 2 south and get the Arrow of Truth from the Order of the Laurel (you must have the Dab of Puce). Go 1 north, 1 east, and 1 north and get the Maintenance Cap (you must have one of the Swords from the Temple of the Dreampainter -- if you have been holding off on getting one to see all three Evil endings, you can't delay any longer). Go 1 south, 1 west, 1 down, 1 north, 2 east, 1 south, bash in the Walking Wounded again, 2 south, 1 east, 5 north, 12 west, 1 north to 5 east 15 north 0 down. Save the game. Camp and equip the Cap. Go north and enter the pool. You will become of Good Alignment. (The other fountain on the level will switch you back to Evil Alignment if you are so inclined.) 2 south. Camp and re-equip Wizard's Skullcap. Box the Cap. 12 east. 5 south. 1 west. 3 north. 2 west. 1 south. Go up. 1 east. 1 south. Get the Crystal Rose (the Order of the Rose will talk only because of your Good Alignment and your release of your curse on Trebor). Invoke and Box the Rose. 1 north, 1 west, 1 down, 1 north, 2 east, 1 south, cream the Wounded, 2 south, 1 east. Save the game.
(If you do not want to play the Good alignment ending, you can just fight your way through the Citadel and not bother with negotiations. You also don't have to encounter the Dukes, though I thought it was satisfying turning them down and battling them myself.)
If you don't have 1,000,000 GP (which you only need for the Good alignment ending), do the following: Malor to 0 east 19 north 1 down. Repeat this: 3 east, 3 west, fighting all the battles, until you have 1,000,000 GP. Malor to 16 east 14 north 1 down and recharge again. 1 north, 1 west, 1 north. Go up. 9 east, 1 north, and say 'TREBOR SUX' again. 1 north, 6 east, 3 north, 2 east, 4 north.
5 north, 10 west, 1 north, read, 1 east, 1 north. Save the game. 1 east. Say yes and take and box Rallying Horn. 1 south, 1 up, 1 north, 1 east. Say yes and take and box the Signet Ring. 1 south, 1 up, 1 north, 1 east, 1 north (this last move will take you through a seemingly solid wall). Say 'MYTHRIL GAUNTLETS' (you did read the manual, I hope) and take the Mythril Glove. 1 south. Save the game.
GOOD ALIGNMENT ENDING: 1 SOUTH. ANSWER YES TO BOTH QUESTIONS.
The rest of this text discusses the Evil Alignment Endings and the Grandmaster Ending.
Box the Mythril Glove. Throw away the Maintenance Cap, the Arrow of Truth, the Orb of Dreams, the Crystal Rose, the Rallying Horn, and the Signet Ring. 1 south and kill the High Dukes of the Realm. 1 north, 1 west, 1 south, go down, 1 north. Defeat the Baron's Council. (You should use the Ka in combat to ensure survival.) 1 west, 1 south, go down, 1 north. Defeat the Captain's Council. If you lost the Ka, Malor to (7E, 8N, 7D) to get it again. Malor to (16E, 14N, 1D). Summon a Demon Lord, Greater Demons, and A Dink from the first pentagram! (How are you supposed to know this? Well, if you look at maps at the top four prison levels, you will notice the letters spelling "DINK" prominently on the maps. As far as I know, there is no way of knowing just *where* this knowledge is useful, save experimentation. The Dink is useless in normal combat, but at least it's immune to magic, so it's not completely defenseless either.) 1 north and save. 1 west, 1 north, 1 up, 9 east, 1 north, 'TREBOR SUX', 1 north, 6 east, 3 north, 2 east, 4 north to 17 east 9 north 0 down. 1 west into the Inn. 2 north and kill Wounded yet another time. 1 north, 3 west, 3 south. Avoid using Tiltowait in killing this group of Chivalry. (If your Dink gets caught, try again.) 1 west and press B. 1 west, read. 2 north. 1 west. 1 north. 2 west. 2 south. Save the game. South and say yes. Kill the five Softalk All-Stars. (It's very hard and will probably take several tries; use the Ka to heal yourself in the midst of the spells. Sezmar and Tuck cast Tiltowait, and Tuck and Sarah cast Malikto. The other two are harmless if you have the Mask. Your accompanying demons and several Tiltowait spells will eventually wear them down if you can survive the first two or three rounds. I've never lost my Dink in this battle, but reload if you do.) If you win, you can pick up some neat loot, including a guaranteed Blade Cusinart' if you still haven't found one yet (though this is not the easiest place to get one!) 1 west and press C, up to level -2 down. Save here.
Use the Ka to heal, if you still have it. If you don't, wander around until you are fully healed, if you have a Ring of Healing or the Dragon's Claw, or use the Cape of Hide or healing potions. (Enter the door to the west to do your wandering.)
If you want to solve the Grandmaster Ending, go two east, over a pit. Then go: 4 north. 2 east. 4 south. Reach into the black hole and take the Nyin (the Void Transducer). Make sure you have at least 80 hit points, then go one south. (You will crash down to the ground level of the castle and lose 79 hit points. It's the easiest way down.) Teleport to 16 east 14 north 1 down. Reload on the best, though it's not absolutely necessary now, as there is no combat on the Grandmaster level. Then Malor to 10 east 9 north 10 down (where you started). (How are you supposed to figure this out? Well, the Oracle tells you where to do it from. A dictionary might help with a couple of his pronouncements.) Equip the Void Transducer and Malor 1 down, to Level 11 Down. Now refer to the section after the Evil Alignment section.
If you want to solve the Evil Alignment Endings, go west one and enter the Temple of Radiant Cant.
Go 2 north and 1 west. Defeat the Temple Priests, but make sure you have at least 50 hit points before attempting to fight. It's OK if you use all your remaining strength in this battle. Go west through the door and save the game.
Go north one and encounter Lord Hawkwind, the Temple Guardian who is the greatest member of the All-Stars you met earlier. You and your Demons, and also any Dragons, Vampires, Archmages, etc., cannot harm him. If you attempt to slay him without a Dink, you won't be able to, although Hawkwind's battle commands ('brush teeth', 'file nails', 'fall asleep', and 'order sushi', to name a few) are very amusing. Eventually, he'll get around to sacrificing you to Kadorto. With a Dink, however, you can win. Go north to Lord Hawkwind and parry each round. Each round, your Dink has about a 20% chance of hitting Lord Hawkwind and inflicting 1313 damage (Hawkwind has *only* 1000 hit points). It seems the most powerful foe in the game is vulnerable to only the weakest enemy. (This the only place in the game where a Dink is remotely useful, so far as I know.) Equip your Sword and the Mythril Glove, and be sure you have the Holy Limp Wrist.
EVIL ALIGNMENT ENDING: Go 2 east through the door. Go north one, making sure that you are wielding a sword from the temple of the dreampainter, that you have the mythril glove equipped, and that you are carrying the holy limp wrist. Notice that the sword you have makes a difference on this ending -- you can repeat this three times with the three swords. The difference between the three endings is substantial.
There is no combat on this level, nor is there any complicated mapping involved. Just puzzles.
The first answer is "FOOT". Go 4 north through two doors. The second answer is "STOMACH". Go 1 north. 4 west through a door. 1 north. 4 west through a door. The third answer is "LEGS". 1 north. 16 east down a long corridor. The fourth answer is "HIPS". 1 north. 3 west. 1 north. 3 west through a door. The fifth answer is "CHEST". 1 north. 7 west through a door. The sixth answer is "RIGHT HAND". 1 north. 16 east down a long corridor. The seventh answer is "LEFT HAND". With the Void Transducer equipped, go north one and answer yes. You'll be teleported to 1 east 14 north 11 down. 1 east. 1 north. The eighth answer is "RIGHT CHEEK". 16 east down a long corridor. The ninth answer is "LEFT CHEEK". 2 north through a door. 3 west. 2 north. 4 west. The tenth answer is "BRAIN". Head 1 west. 1 south. This one is not quite so easy, but the answer is "TREE OF LIFE." (You get a hint for solving this one by using the Orb of Dreams you got from Trebor's orders.) Head south, until you reach the last being, from whom you get the final object, the Kris of Truth. Teleport back up to the Castle (you may want to visit the Pentagram on 1 Down first).
Follow the instructions for the Evil Alignment Ending straight to Lord Hawkwind. After defeating him with a Dink, go in the inner sanctum.
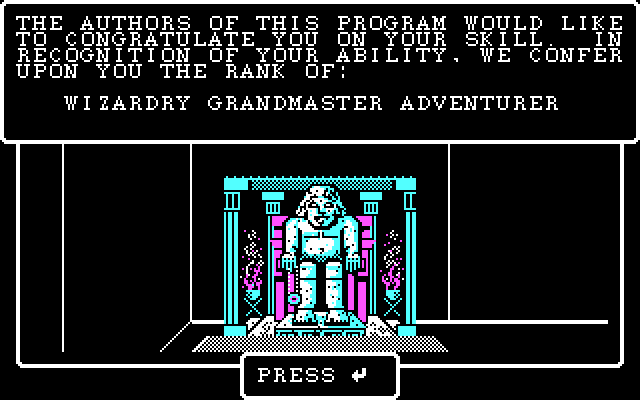
THE GRANDMASTER ENDING: De-equip any weapon you are holding and replace it with the kris of truth. Equip the other items indicated in the evil alignment solution. Go to the statue of kadorto and watch the grand finale.
You've finished the most difficult CRPG! Theoretically, I shouldn't help people with this ending (like the ending text says), but this guide only became public many years after the game came out, so I think I'm safe (no one from Sir-Tech ever complained, anyway).
|
|
|
|
|
|
|
|
|
|
|
|
|
|
|
||||||||||||||
Created, maintained and © by John Hubbard (write to me). Disclaimers. Hosted by Dreamhost. Last modified: July-18-2003.