|
The type of party you will aim for depends on what version you are playing. Good and Evil characters cannot travel together in the same party. This rule prohibits a Lord and a Ninja from being in the same party. However, some versions of Wizardry change your character alignments if you do not treat friendly groups of monsters according to your alignment. The Apple II version does not do this, but the Wizardry Archives version does. You can therefore change your party alignment back and forth (it may take several friendly groups to convert all characters) so as to include a Lord and a Ninja in your party. (I don't consider this a cheat, so much as a design flaw of some of the versions). See also the cheats section for instructions on traveling with Good and Evil characters.
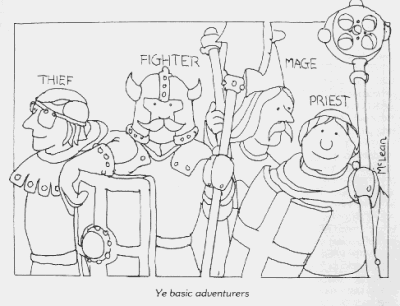
For your first six characters, I recommend starting with a Fighter (to become a Ninja), a Fighter (to become a Lord), a Samurai, a Priest, Bishop, and Mage. Keep rolling when you create a character for at least 20 extra points. Race attributes are more or less the same, so select one that fits your chosen names. In case you're really interested, though, below are the starting attribute points for each class.
| Attribute | Human | Dwarf | Elf | Gnome | Hobbit |
| Strength | 8 | 10 | 7 | 7 | 5 |
| I.Q. | 8 | 7 | 10 | 7 | 7 |
| Piety | 5 | 10 | 10 | 10 | 7 |
| Vitality | 8 | 10 | 6 | 8 | 6 |
| Agility | 8 | 5 | 9 | 10 | 10 |
| Luck | 9 | 6 | 6 | 7 | 15 |
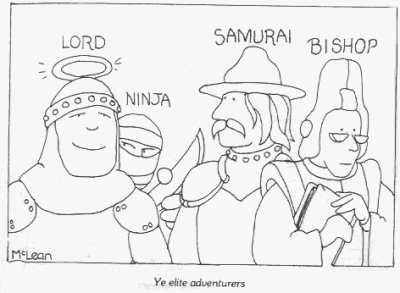
Your first upgrade character will be a Lord, so for now make the party all good. Once you upgrade the Lord, switch to Evil to get your Ninja. Then you can switch back if you don't like having to fight friendly monster groups. If you can't change alignments, decide beforehand if you want a Lord (extra healing for the party) or a Ninja (critical hit ability, especially important for you-know-who). Below are the required attributes for each character class.
| Class | Strength | I.Q. | Piety | Vitality | Agility | Luck | Alignment |
| Fighter | 11 | - | - | - | - | - | Any |
| Mage | - | 11 | - | - | - | - | Any |
| Priest | - | - | 11 | - | - | - | Good or Evil |
| Thief | - | - | - | - | 11 | - | Neutral or Evil |
| Bishop | - | 12 | 12 | - | - | - | Good or Evil |
| Samurai | 15 | 11 | 10 | 14 | 10 | - | Good or Neutral |
| Lord | 15 | 12 | 12 | 15 | 14 | 15 | Good |
| Ninja | 17 | 17 | 17 | 17 | 17 | 17 | Evil |
Take time to create your characters! If you get bad dice rolls for your extra points to spend, try and try again. This is especially important for your first three characters, but there's no reason all characters shouldn't be started with less than 20 free points. These will become valuable points as you progress levels over time. It takes progressively more experience and you earn fewer hit points as you go. Below are the experience points needed for each class to gain levels.
| Level | Fighter | Mage | Priest | Thief | Bishop | Samurai | Lord | Ninja |
| 1 | 1000 | 1100 | 1050 | 900 | 1200 | 1200 | 1300 | 1450 |
| 2 | 1724 | 1896 | 1810 | 1551 | 2105 | 2105 | 2280 | 2543 |
| 3 | 2972 | 3268 | 3120 | 2674 | 3677 | 3677 | 4000 | 4461 |
| 4 | 5124 | 5634 | 5379 | 4610 | 6477 | 6477 | 7017 | 7826 |
| 5 | 8834 | 9713 | 9274 | 7948 | 11363 | 11363 | 12310 | 13729 |
| 6 | 15231 | 16746 | 15989 | 13703 | 19935 | 19935 | 21596 | 24085 |
| 7 | 26260 | 28872 | 27567 | 23625 | 34973 | 34973 | 37887 | 42254 |
| 8 | 45275 | 49779 | 47529 | 40732 | 61356 | 61356 | 66468 | 74129 |
| 9 | 78060 | 85825 | 81946 | 70227 | 107642 | 107642 | 116610 | 130050 |
| 10 | 134586 | 147974 | 141286 | 121081 | 188845 | 188845 | 204578 | 228157 |
| 11 | 232044 | 255127 | 243596 | 208760 | 331307 | 331307 | 358908 | 400275 |
| 12 | 400075 | 439874 | 419993 | 359931 | 581240 | 581240 | 629663 | 702236 |
| 13+ | +289709 | +318529 | +304132 | +260639 | +428479 | +428479 | +475008 | +529756 |
If you're in for the long haul, consider swapping the classes of your Mage and Priest once they learn all of their spells. This will essentially turn them into bishops, and increase the total spell power of the party. Fighters, however, earn extra attacks with every 4 levels of experience, so don't switch them around other than to upgrade them to a Lord or a Ninja.
When you change classes, your virtue points are reset to the starting minimum for your race, so it will take some effort to regain your stats. You also gain seven years with each class change, which brings up another point...
Never pay at the Adventurers Inn. Always rest in the stables for free. Use priest spells to heal everyone, until you are fully refreshed. This also avoids excessive aging, which characters can actually die from. (Its not a pleasant experience!)
You're now ready to venture into the Maze. At first you will dash in an out to gain the first few precarious levels. Then, to gain a lot of experience on Level 1, head down the hallway you start facing, then take a right. Continue until you pass a door, then turn left, go north one, turn right, then head straight until you reach the end of a corridor. Kick and you will go through it. Continue and search each of the rooms until you find Murphy's Ghost (5N, 13E). These guys aren't too dangerous but have a ton on hit points. For killing two ghosts with a party of six, everyone gets 1463 experience points!
Eventually your party will want to start mapping the rest of the dungeon and collecting items. As you grow stronger it will come time to face the Archmage Werdna and win the game. New characters would not survive in the second scenario, so you will need to transfer your party to Wizardry II once you have finished Wizardry I.
See the Building a Party section on how to create and build up your party. Along with experience points, you'll want to obtain the premium items (those not stocked at Boltac's) for your characters. To do this you'll need to watch out for chest traps, by either inspecting the chests or just casting Calfo:
| Chest Traps | Effect when Triggered |
| Poison Needle | Poisons the opener |
| Gas Bomb | Poisons various party members |
| Exploding Box | Direct hits damage |
| Anti-Mage or Mage Masher | Paralyzes all Mages and Bishops |
| Anti-Priest or Priest Masher | Paralyzes all Priests and Bishops |
| Blades | Hits damage to party members |
| Teleporter | Teleports the party within current floor |
| Alarm | Encounter another monster group |
| Crossbow Bolt | Hits damage to opener |
| Splinters | Random damage to party members |
The first Right of Passage is on level four. Take the elevator (A-D) at (LVL1 10E 8N) down to level 4(D) and head towards the Monster Allocation Center. You'll eventually fight a junior version of your final battle (12E 12N), beyond which you will be rewarded with a Blue Ribbon. Carrying this permits you access to the second elevator (A-F) at (LVL4 10E 0N). Once you are pumped up enough, head down to level nine (F) and take the chute at (LVL9 8E 2N) into Werdna's Domain (Level 10).
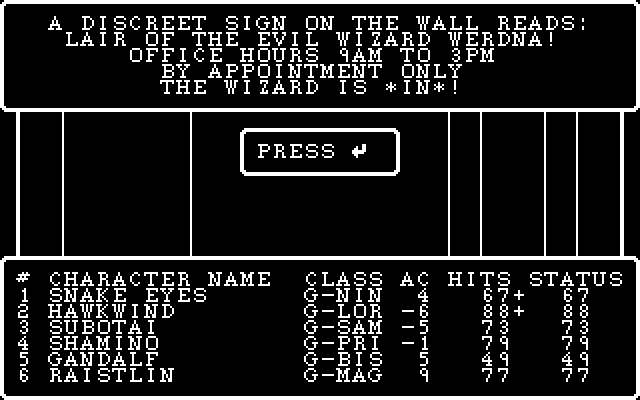
Read Werdna's warning. "Trebor Sux" doesn't mean much, but it does, however, come up much, much, later. Werdna and Trebor, by the way, are the two game creators first names spelled backwards. "Contra Dextra Avenue" means don't take the right passage. Following this advice, you'll soon come to Werdna's office:
|
Werdna's got some Vampire friends over, and he can cast Tiltowait as well. Try for the critical hit if you have a Ninja, and throw all of your Tiltowait and Malikto spells at them, you may get lucky and actually have once of the spells get through. If you can afford it, consider casting Mahaman.
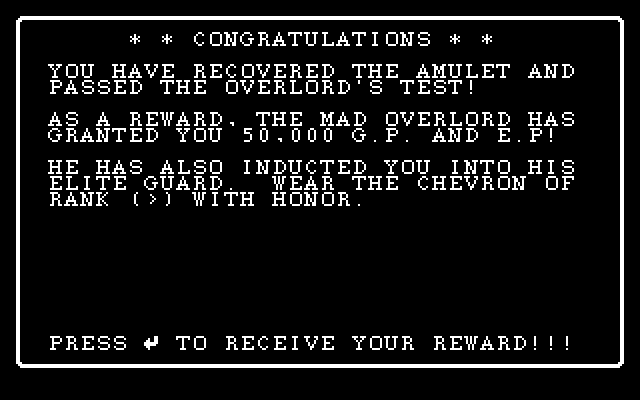
Once you win, equip and invoke Werdna's Amulet. Use it the next encounter, and head back to the castle. You will be rewarded 250,000 experience points, and most importantly, a Chevron on your character stats to take to Wizardry II. When you return with the Amulet, you lose all your items. One version of the game allows you to go down and beat Werdna again and again, while another shows the Wizard as being *OUT* after you win. The Wizardry Archives only gives you 50,000 exp and gold upon completion, but you get to keep your items, and Werdna is always *IN*.
For a more detailed walkthrough see GameFAQs.
Your bishop is the key to the biggest cheats in the game. Instead of identifying items 1-8, try some other keys to obtain near immortality:
However, this trick does not work in all versions! In the Wizardry Archives, it does not.
The other most useful cheat is Recover. If something bad happens, such as a level drain or a visit to the cemetery, you can take advantage of the power-outage utility (R)ecover. Exit the game, go the utilities (either at start up or the edge of town) and recover your "Out" characters. They will be restored to their last saved status. If you are playing the Wizardry Archives, it is also just as easy to make backup copies of your scenario file. These backups are particularly useful in ensuring your characters enjoy profitable level gains.
Another utility that can be taken advantage of is Transfer. By making copies of scenario disks, you can quickly double any character, gold, and items you want. The only thing to remember is to change the duplicate character's name, so they can be transferred into the new scenario. The Wizardry Archives, however, do not permit this trick: no transfers are allowed between scenarios of the same number, and characters can only be transferred up in scenario numbers (1 to 2 is allowed, but not 2 to 1; plus even then all items are deleted upon transfer).
Can Good and Evil characters travel together? Yes! You can use a party in Wizardry made up of Good and Evil characters by following these steps:
Lastly, all newly created characters come with some gold, so you can create twenty characters, pool their gold to one character, and delete all but your cashbag. This process can be repeated as desired. Between not paying at the Inn and getting most of your items in the dungeon, you'll find that money becomes not too important in the game. Adding a few better items to you newly created characters doesn't increase their small survival chances that much anyway. It is a good idea, however, to hang onto the gold you have, just in case you need to visit the temple (more reliable than your own spells and doesn't decrease the character's vitality).
|
|
|
|
|
|
|
|
|
|
|
|
|
|
|
||||||||||||||
Created, maintained and © by John Hubbard (write to me). Disclaimers. Hosted by Dreamhost. Last modified: April-04-2020.